Laptop LCD Screen Repair and Installation Guides
Step 1
This should always be your first step when working on a laptop. Remove all power from the laptop. Make sure to unplug the laptop from the wall and remove the
battery. The LCD screen contains circuits that amplify voltages above 500 volts. It can be very dangerous, so please unplug all power sources.
Step 2
Place laptop on a secure flat surface like a desk. The only tool that you will need is a small philips head (+) and small flat head (-) screw driver. Tilt
your Laptop LCD Screen back so the laptop is now in a flat line.
Step 3
Remove the small rubber screw hole covers to expose the screws below. To remove these screw covers, take your small flat head screw driver and insert it on
the side of the screw cover sliding it down the separation between the rubber and the plastic. These rubber screw hole covers are held on with double sided
sticky tape which may need to be replaced upon reassembly.
Step 4
Remove screws that hold the Laptop LCD trim bezel on. There are usually between 2 - 6 of these screws. Unscrew screws using the philips head screw driver.
Remove them and set aside.
Step 5
Removing LCD Front Trim Bezel
This next step can be difficult so please be careful not to damage the LCD trim bezel. To remove the Laptop LCD trim bezel use your hands only. Start on the
inside of the screen's viewing area as pictured. This bezel is snapped on and will require you to unsnap it. Work your way all the way around the inside of
the laptop LCD popping it up. Once you get most of it unsnapped you will be able to remove the entire bezel and set aside.
Step 6
Removing the notebook LCD display.
This is the next step in the Laptop LCD Screen repair. Unscrew the screws holding the LCD screen in place. Depending upon which model Dell laptop you have the
screws may be located on the top face around the screen (as pictured) or on the spine of the screen. There are usually at least 4 screws and sometimes 6
screws that hold the LCD display in place.
Step 7
The laptop LCD repair is almost complete. You must now tilt the screen forward to display the back of the screen. There is going to be a ribbon cable that
connects to two parts of the screen. Most of the time there is one connection at the top and one connection at the bottom (see picture). Unplug the top LCD
ribbon connector then the bottom inverter connector.
Step 8
Replacing with new Laptop LCD Screen Reconnect cables and install screen back into the laptop. There are not any settings or software that needs to be changed or updated. It will be ready to go.
Monday, November 1, 2010
Dell Latitude D820 Battery
Replacement for Dell Latitude D820 Battery 4400mAh
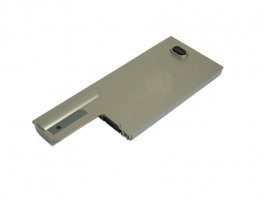
Specification:
Battery Type: Li-ion
Battery Volt: 11.1V
Battery Capacity: 4400mAh
Battery Color: Metallic Grey
Battery Weight: 476.28g
We promise you to obtain Dell Latitude D820 Battery 4400mAh with highest qualtiy from us, for:
# 1. Dell Latitude D820 Battery 4400mAh supplied by our Company is brand new.
# 2. 1 Year Warranty!
# 3. 100% Q.C. of Dell Latitude D820 Battery 4400mAh.
# 4. 30 days Money back guarantee!
# 5. Usually ships the same business day.
Subscribe to:
Posts (Atom)